Binocular Disparity




Introduction
Although you rarely notice it, your eyes actually provide two slightly different views of the world. This activity illustrates how your visual system uses this binocular disparity to determine the relative distances of objects in space, achieving a sense of depth called stereopsis.
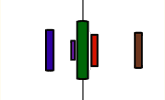
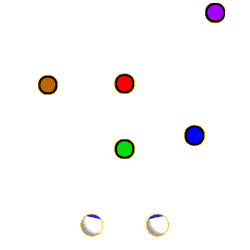
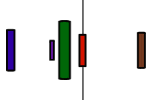
At left you see a visual scene from above: five colored cylinders are sitting in front of two disembodied eyeballs. Currently, the eyes are focused on the red cylinder. Below, you see the images that the cylinders cast on the left and right retinas (remember that the retinal images are inverted).
Instructions
Click on the “Simple Demonstration” link on left to convince yourself that binocular disparity really does exist. Then go through the other links shown from top to bottom.
Binocular Disparity Exercise
The upper part of the image on the left shows a top view of a simple visual scene with five colored cylinders (which look like circles from this angle) and a pair of eyes looking at the red cylinder. Below this, you see two pictures that show what each of the two eyes are seeing.
Click on a cylinder to see lines showing where the image of the cylinder falls on the retinas of the two eyeballs. You will also see a description of the disparity information for the cylinder in the blue portion of the screen.
- Click the cylinder again to remove the lines from the picture.
- Click the eyeballs to show them close-up, and click them again to remove the close-up images.
- Click the HOROPTER button to show or hide the horopter.
Go through the cylinders in this order: red, brown, green, blue, and purple.
Red Cylinder
Since the two disembodied eyeballs are currently focusing on the red cylinder, we know that the images of this cylinder are falling on a specific place on both retinas—the foveas. Hence the foveas are corresponding points on the two retinas. If an image is falling directly on the fovea in the left eye, then it is also falling on the fovea in the right eye. Narrow vertical lines are placed in the exact centers of the eye views at the bottom of the yellow portion of the screen, so that you can tell that the image of the red cylinder is falling on exactly the same place on the two retinas.
Most objects in a scene, however, do not fall on corresponding points of the two retinas.
Click the brown cylinder next to see and read about what happens when object images fall on non-corresponding points...
Green Cylinder
The green cylinder sits directly in front of the red cylinder that the eyes are fixated on. As you can see in the eyes’ views, this means that the image of the green cylinder falls to the left of the red cylinder in the left eye, and to the right of the red cylinder in the right eye. (This is similar to the situation in the disparity demonstration you did earlier. There, your finger was almost right in front of the arrow, and it jumped from one side of the arrow to the other as you opened and closed either eye.)
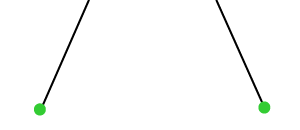
In fact, as you can see by the lines connecting the cylinders and retinas in the top part of the screen, the images of the green cylinder are exactly as far away from the retina in one eye as they are in the other eye. These are not corresponding points, however, since the images are falling on different sides of the fovea in each eye.
Click on the blue cylinder next.
Purple Cylinder
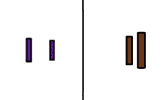
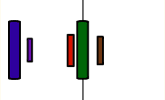
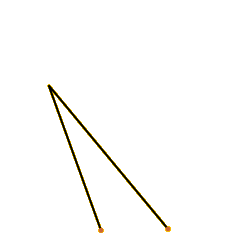
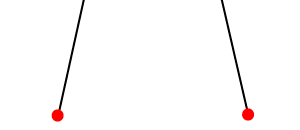
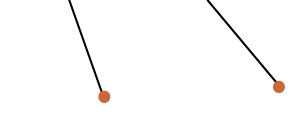
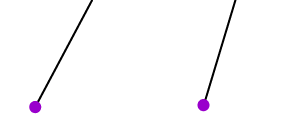
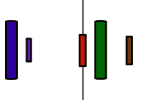
As with the brown and green cylinders, the image of the purple cylinder falls on disparate retinal points. You should also notice that the difference in the locations of the images of the purple cylinder is considerably larger than the difference for the brown cylinder, a fact that is most evident if we superimpose the two views, as shown at right. The purple cylinder is also farther away from the horopter than the brown cylinder.
This is the final piece in the disparity puzzle: The greater the degree of disparity, the farther an object is from the horopter. Therefore, by determining the degree of disparity for each object in the environment, the visual system can determine the relative distances between each object and the horopter.
Blue Cylinder
Although you might not guess it if you only saw the top view of this scene, the image of the blue cylinder falls on corresponding points on the two retinas. This is most clearly seen in the two eye views at the bottom. The blue cylinder image is larger in the right than in the left eye, but is centered at the same point on the retina in both views.
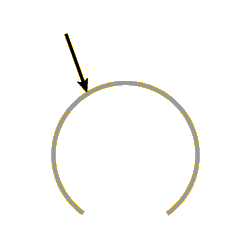
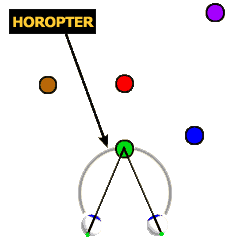
The set of points in the world that project images to corresponding retinal points is called the horopter. You can view the horopter for this scene by clicking on the HOROPTER button in the upper left corner of the screen. As you can see, it is semicircular in shape, passing through the object being fixated and the fronts of the two eyeballs.
Click the purple cylinder to complete your tour of the scene.
Brown Cylinder
The image of the brown cylinder falls on slightly different places in the left and right retinas. You can see this in the two eye views at the bottom of the yellow portion of the screen. The distance from the red to the brown cylinder is bigger in the left-eye than in the right-eye view. (Incidentally, note that the image of the brown cylinder is also slightly larger in the left eye than in the right eye. This is because the brown cylinder is closer to the left eye.)
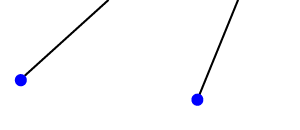
You can also see the disparity in retinal position in the top view of the scene. Closely examine the lines that run from the cylinders through the pupils of the eyeballs to the retinas.* (Click on either of the eyeballs to see a close-up view of the eyes and these lines. Click again on either of the eyeballs to remove the close-up view.) Clearly, the image of the brown cylinder is falling farther away from the fovea in the left eye than in the right eye.
Click the green cylinder next.
*Remember that due to the optics of the eye, objects on the left side of the world fall on the right side of the retina, and vice-versa. This is why the image of the brown cylinder, which is to the left of the red cylinder in the scene, falls on the right of the red cylinder on the retina.
A Simple Demonstration
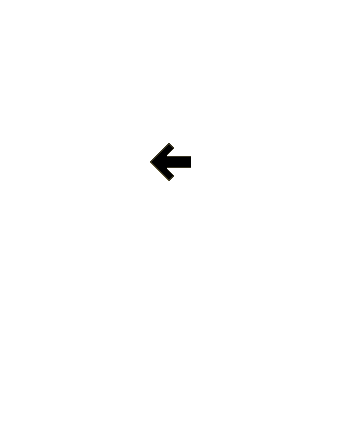
Close your left eye and hold your right index finger up about six inches in front of your face and positioned so that the arrow on the left is to the right of your finger, pointing toward it. Then close your right eye and open your left eye. Now your finger should be to the right of the arrow, with the arrow pointing away from your finger! Switch your open eye back and forth to see your finger dance from one side of the arrow to the other. This quick demonstration should be enough to convince you that your two eyes really do provide slightly different views of the world.
Stereopsis
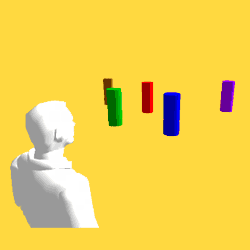
The picture at left shows what our scene looks like from just above, behind, and to the right of the disembodied eyeballs, which here are re-embodied in the man on the left side of the picture. Note that depth cues such as occlusion, relative size, and relative height are available in this picture, so you can properly determine the depth relations of the five cylinders. But in viewing this or any other two-dimensional picture, you don’t get the strong impression of depth that you do when you see a real, three-dimensional scene.
This extra sense of depth is called stereopsis, and it is achieved via the disparity calculations described elsewhere in this activity. Proving that stereopsis is dependent on binocular information is quite easy—just close one eye and walk around the world for a while viewing it monocularly! You will find that you lose much of your sense of depth with the loss of information from your second eye; depth perception will be particularly hindered when you are standing still because the motion parallax depth cue is eliminated.
Shifting Focus
The figures at left now show what happens if the disembodied eyeballs’ gaze is shifted, so that they are focused on the green cylinder rather than the red cylinder. (Click any of the cylinders or the link below to toggle back and forth between focusing on the green and red cylinders.) As you can see, disparity information shifts as gaze direction is shifted (although the changes are made much more dramatic than normal in this scene because the objects are all placed so close to the viewer).
In particular, note that images of the blue cylinder, which fall on corresponding retinal points when the eyeballs are focused on the red cylinder, fall on disparate retinal points when gaze is shifted to the green cylinder. Indeed, the whole horopter shifts along with the shift in focus. This illustrates the fact that binocular disparity provides only relative depth information. The disparities of the various objects in the environment tell us how far away objects are relative to the horopter, but we cannot tell exactly how far away the horopter is; furthermore, the horopter changes every time we look at a new object!
This demonstration should also impress upon you the incredible amount of computation that the visual system must carry out to achieve stereopsis. Every time we shift our gaze, the system instantaneously recalculates the disparity information from every object in view, updating our sense of three-dimensional space.
Final Demonstration (part 1)

In our final demonstration, you will see what happens when radically different images are projected onto the two retinas, a situation called binocular rivalry. Follow these steps for the demonstration:
- Take a piece of white paper and roll it into a tube about 1 inch in diameter.
- Hold the tube with your right hand, then place your left hand so that the side of your palm is touching the tube about halfway down its length (see image at right).
- Now close your left eye and place the tube over your right eye so that you’re looking through the tube.
- Move the tube so that you see the little dancing demon in the image on the left with your right eye.
- Now open your left eye, keeping focused on the demon.
If the demonstration works, you should see the demon appearing through a quite realistic-looking hole in your hand! You can then move the tube, your hand, and your head around and view the rest of the world through the hole in your hand.
Final Demonstration (part 2)
Remember that the visual system always receives two different pictures of the world from the two eyes, and is constantly working to reconcile the discrepancies in the two pictures. When the pictures are radically different in some areas, a phenomenon called binocular suppression kicks in, whereby the system ignores the information from one or the other eye. The most common example of binocular suppression is how the eyes deal with the nose. Your nose is constantly blocking the far left side of the right eye and the far right side of the left eye, so the visual system usually suppresses these portions of the visual field. (Now that we’ve pointed this out to you, at this moment binocular suppression is probably failing, but in another 10 minutes it will have kicked back in and you’ll once again be blissfully ignorant that your nose is hiding a significant portion of the world.)
Given the choice between a uniform field and a more interesting swatch of visual information, it makes sense to pay attention to the latter. In our demonstration, your visual system suppresses the inside of the tube, which is filling most of your right eye, and the small patch of your palm that falls on the portion of your left retina corresponding to the small circle of interesting information being received through the tube on the right retina. What does this all add up to? A hole in your hand.
